Level Design is a really important process in the development of a game. Without level design we would only have a pretty space to walk around in. It is much more than just drawing a map that looks cool. This isn’t solely the visual experience but is the way the map, puzzles, and visuals come together to create a cohesive picture. Level design is the process of creating the world that the player experiences. It takes a lot of work and iteration and as a team we have done much of that.
We start with discussing what game elements should be in each level. A list is created of all of the aspects that will make the level unique: the kinds of puzzles, what obstacles the player should come into contact with, as well as the visual aesthetic of each level. The visual aesthetic is extremely important. It tells us the basics of what we can and can’t do. For example, the water themed level should have a lot of puzzles that involve water and swimming, but should not include anything fire or lava related. This limits what we can do aesthetically and what we can do with puzzle design.

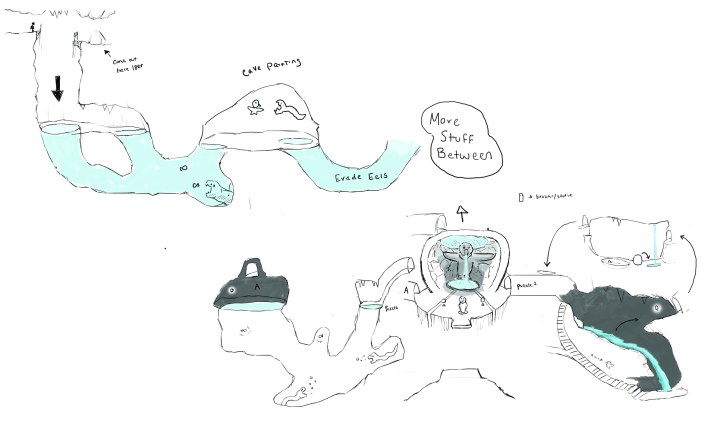
After the list of all of the elements that should be in each level is created, we begin drawing out maps. This allows us to think visually about the flow of the level design. Drawing out the maps helps us to begin designing the puzzles, thinking through the steps that make a puzzle fun but challenging. There needs to be a variety of puzzle difficulty. Some puzzles need to be difficult and others that the player can solve pretty easily. Additionally, we need to work on the flow and order of the game. Having important concepts introduced to the player in early levels is important so that he or she can successfully navigate more difficult levels later in the game. At the early stages there is no right or wrong design. Many of the best ideas come from the most random encounters.
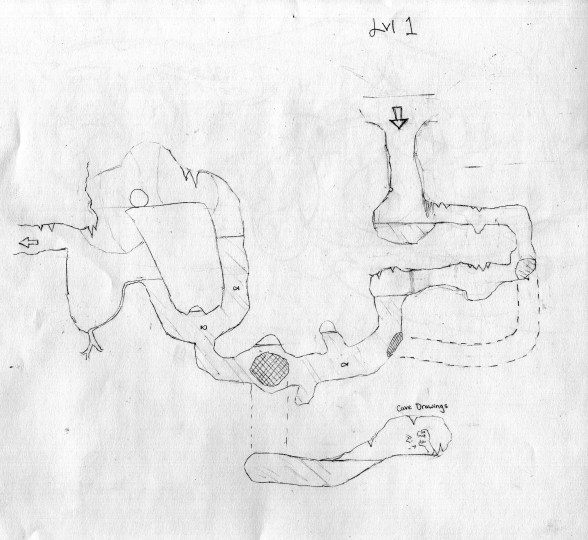
Our team comes together after coming up with much of the level design to look at the positives and negatives of each other’s ideas. Working as a group really helps the overall decisions making. Everyone sees things differently which allows for a lot of unique and interesting discussions which lead to better design overall.
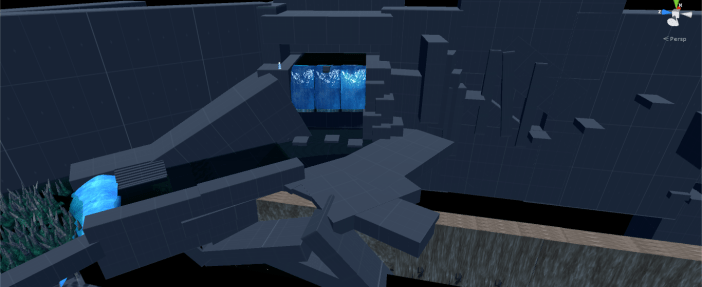
After we have a good idea for different puzzles we begin to build everything out in Unity. Gray boxing is the process of creating a level through the use of basic geometry. It lets us build prototypes of individual puzzles and whole levels that our team is able to play test. We want to make sure the gray box experience is what we want the actual experience to feel like. If a puzzle isn’t intuitive, fun, or working as intended, it will not work as fully functional play experience even if looks pretty. The gray box stage allows us to do lots of testing to refine our game before we start putting in tons of work to a level or area that might get cut from the final game.
At this point we go into each level and do a rough visual pass to make it feel similar to the rest of the game. The visual pass is the process of going through and replacing all of the gray boxes or in our case blue boxes with real assets that the art team has been working on.
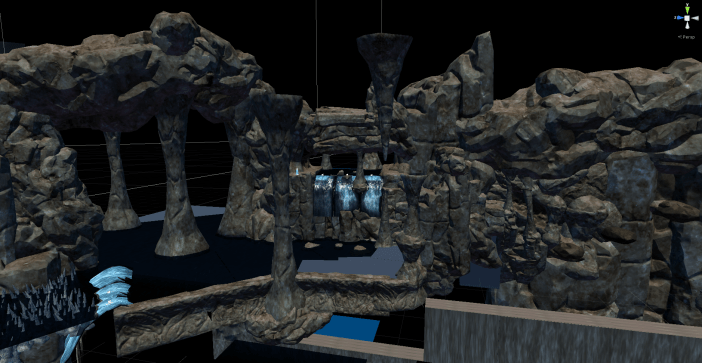
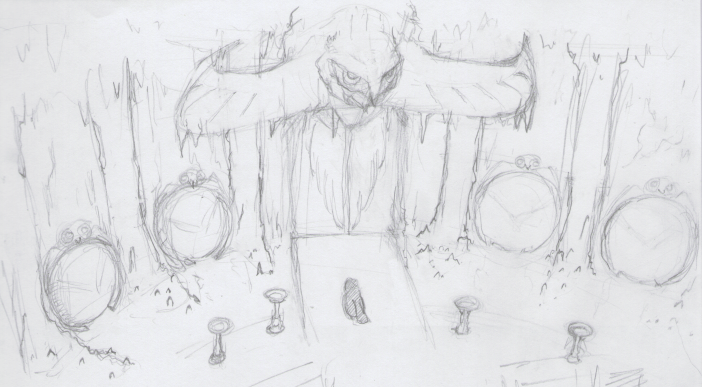
After the set dressing pass we push it on to our lighting guy to do an early lighting pass. The lighting pass is an early test of what the overall lighting of the game will look like. This allows the artist to have a better idea of what the space will look like while they do the final set dressing. Once the lighting pass is done we can go back into the space and really refine the visuals. We work to make each level feel unique but also have a cohesion across the game. This is when we introduce more of the individual models of specific pieces needed for each area. For us this includes owl statues, mushrooms, plants, and more.
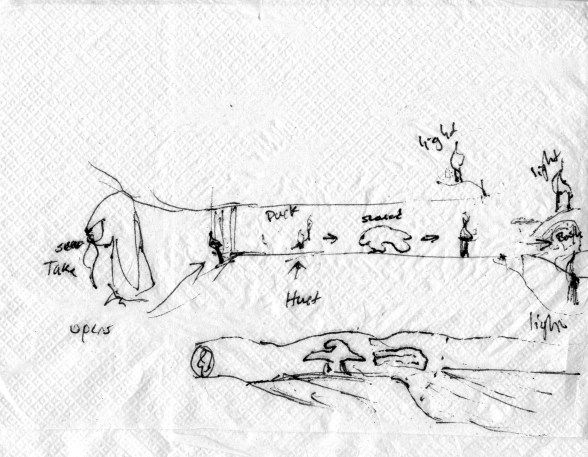
Our most recent challenge for level design has been reworking our temple level. The temple level is a large temple created by the ancient owl civilization. It is supposed to be grand but dilapidated. It is introduced early in the game and is where you access other levels. It has been a challenge to design this place both visually and mechanically. Originally, this space was supposed to be its own completely contained level. Our project scope was too large for the amount of time we had and we had to make compromises. In order to keep the most important area of our game, without having to cut an entire space, we decided to do some massive changes to how temple level would work. Instead of being complete level it is now a hub space. This allows us to keep the space for use as the end level of the game without having to change much of the original design.
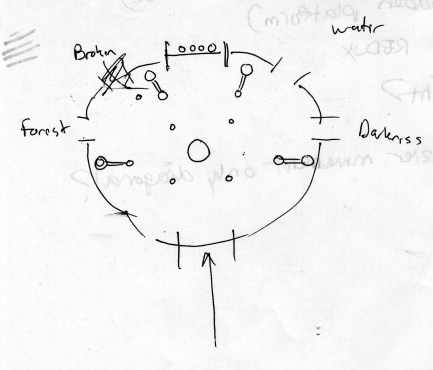
Above is an early design for what the space was originally supposed to look like. Before the redesign you were supposed to do a small puzzle that returns you to an environment similar to each of the past levels you encountered and offers you a chance to further refine your understanding of the puzzle in each area. After completing all of them you would unlock the entrance to the temple.
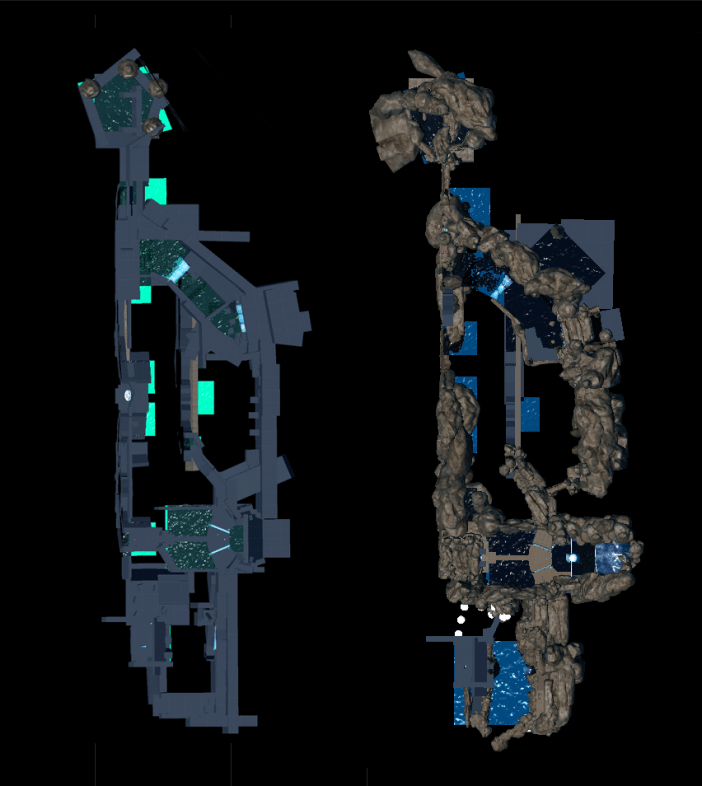
Thanks for reading and I hoped you learned a lot about how we do our design. Also above is a sneak peak of what our temple hub might be looking like.
-Mitch Design Lead Strix Studio