Hello Everend blog readers,
I am the lighting designer and one of the programmers of the team. I am going to talk to you about the lighting of Everend. I will walk you through the lighting from day one to the current development. Some of the sections that I will talk about are the baking process and the steps I take when baking the light for the game, some of the cheats I use to help keep the performance down while still keeping the lighting worthy of the game.
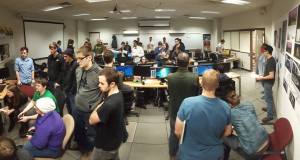
When we first started in the fall, we talked about the roles everyone would be doing. I have had almost eight years of experience in theatre lighting so I said that I would be interested in lighting and Emily our art lead said that the experience may be useful because lighting would be a big component of the game. At the time I was a little nervous; a programmer was about to step into the realm of artists, but I threw caution to the wind and spread my wings, then I jumped. I then remembered I am not Kaia and I do not have wings so there was that.
Having the experience in theatre was not going to guaranty that I would be able to do the things that we envisioned at that point. I spent the first few weeks working on tutorials and documentation about lighting in Unity, the engine we are using to make the game, after that I felt I had the tools necessary work in Unity. That brought up the next big question though, what should light look like in a cave? I wanted to make sure that the light was realistic looking and would interact with the art of the levels positively. The trip to crystal cave that the team did in the fall was a big help to that. It was such a big help that we wrote a blog post about that, you can find that here: https://thatowldevblog.com/2015/11/19/crystal-cave/. Taking what we gathered there we felt more confident about the lighting. As Mitch and Emily worked on building the levels I talked with them about what they wanted for lighting. After the first level was finished being boxed out and was starting to be set dressed I took some screen shots that Emily pasted together and started marking it with locations of lights and what she wanted those lights to do.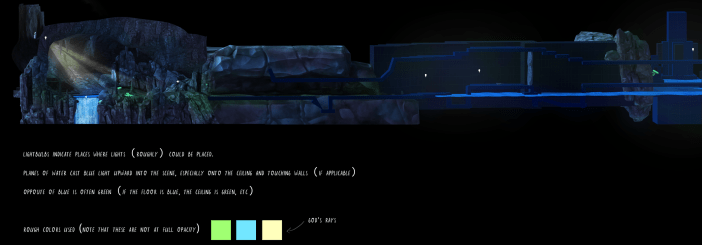 This is what I was handed which I then used to place the lights in the game.
I started to experiment with a few different lighting settings including a shader setting called emission. Emission uses a map that is in greyscale which shows which sections emit light and which ones don’t, this saves on lights in the scene and are just as diverse as regular lights. One major thing that I determined would make the performance of the game faster was to bake out as many of the lights as I could before we built the game. Baking means that we take lights that are set to baked or mixed and use the light that they emit and shine and project it onto anything in the scene that is set as static, these are things that we are not expecting to move at all walls, floors, and ceilings are examples of this. Before baking and the placement of the lights we have this: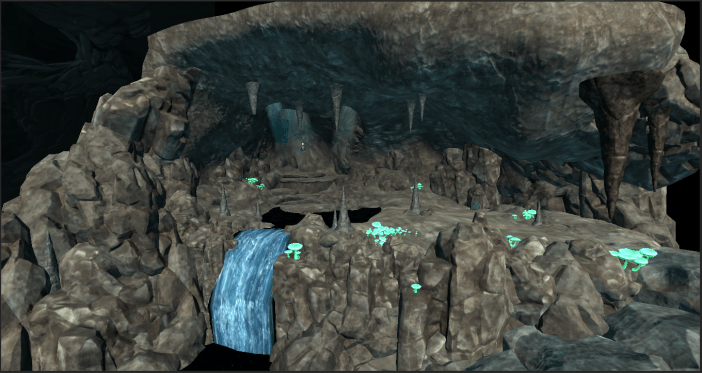 After the placement of lights and baking those out we have this:
 One thing that you may be asking yourself is, what about Kaia? She moves around? Baking will not affect her, or will it? A cheat that allows me to get away with having most of the lights be set to baked is light probes. These probes grab the light that is shone on them and saves it as a small map. Those probes then communicate between their close neighbors and when a dynamic object moves through those probes the ones closest to it form a tetrahedron, a polyhedron composed of four triangular faces, and will apply the light data stored by those probes to the dynamic object. One big thing to keep in mind is that if those probes are not placed very close together or there is a major change in light between two probes which are not adequately placed it can cause slight problems with the dynamic object. When I place probes I have to make sure that I place enough probes in major changes of light to give the feel that the dynamic object is being properly affected by the lights. Here is a picture of the probes in the first area of the first level. The yellow spheres are the probes themselves the purple lines are the connections between those probes.
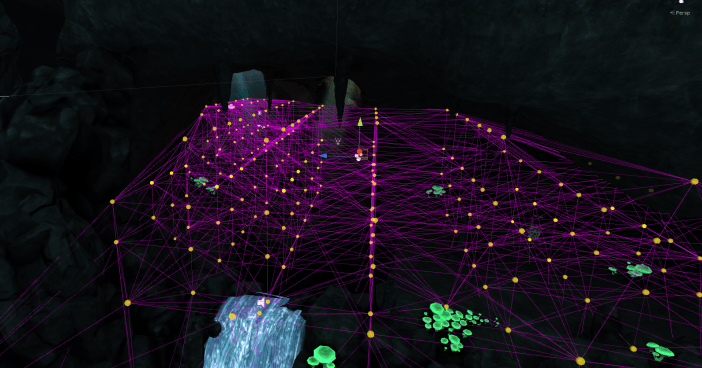 Yeah that is a lot of probes but it is important that they are there, because without them Kaia looks like this.
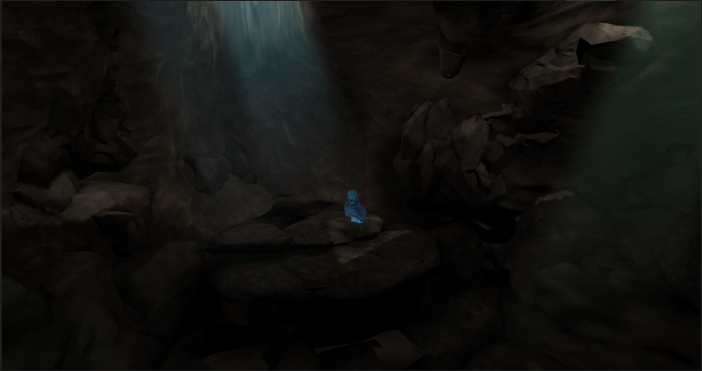 Now I know what you are thinking “that does not look too bad” but when you compare it to this.
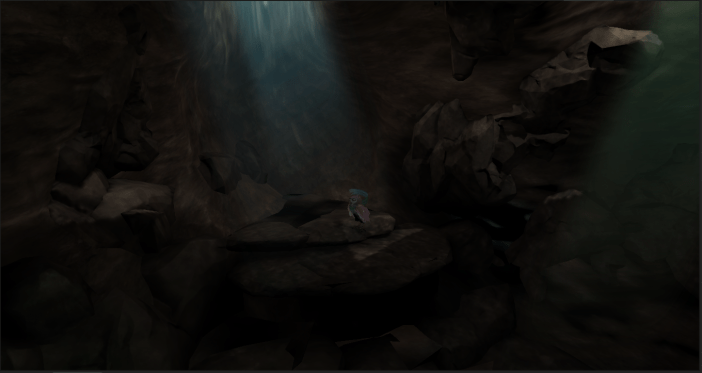 It looks a lot more realistic. Kaia looks like she is being affected by the sunlight and we are saving on performance because there are less dynamic lights in the scene. Here is a look at what it looks like in the scene view instead of the game view of Unity.
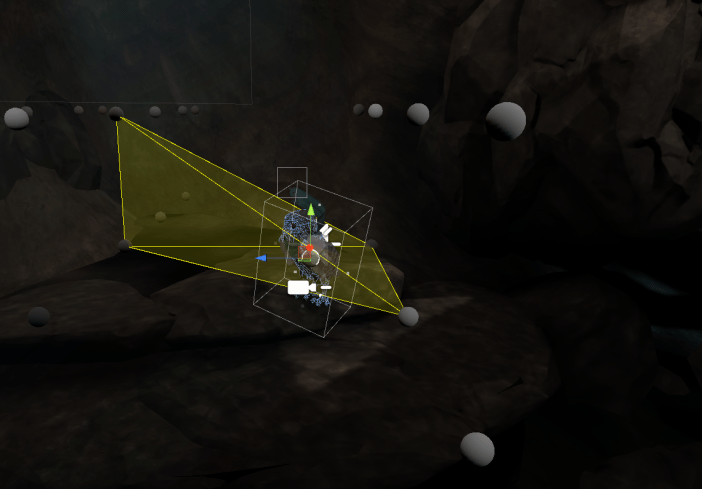
The yellow area is that tetrahedron that I was talking about earlier. You can see the greyish spheres that are in the area are those yellow spheres from earlier and they are showing how the lights are affecting them really well.
Now that I have rambled on for a bit I will talk about the actual baking process and the steps that I take to bake out the lights for a scene. In Unity there is a window for lighting with a large amount of settings. I am not going to go into detail about each individual setting but I will go into detail about a few of them. One of the big things I use to add color to the scene without using a lot of lights is the ambient source. I use a gradient of three colors that I get from Emily. I spent a few more weeks working on getting the settings for baked global illumination ironed out. The settings that I came up with allow me to quickly turn around the lighting and show Emily and Mitch what the scene looks like with lighting in. Here is photo of the quick turnaround lighting.In the baked GI section there are two settings that I do not have set when I do the quick turnaround they are very costly in the time department. The first of these is final gather to improve the quality of the light ray tracing is used at the last bounce that the light makes it adds to the visual quality significantly. Here is what that looks like.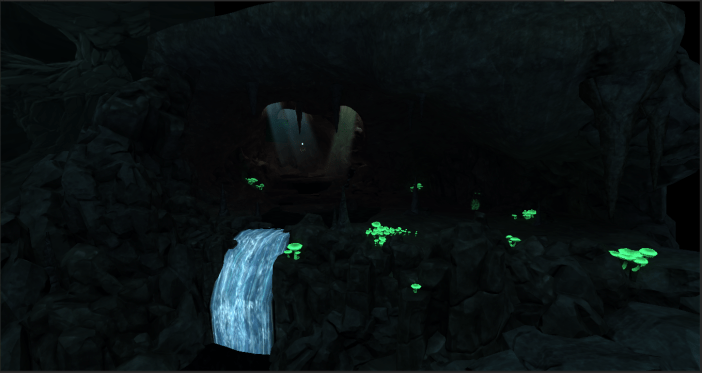 The second of the settings is ambient occlusion. Since the light will hit everything indiscriminately corners and indents will be lit just as much as the flat surfaces. This will determine how large the contrast is and how far those shadows will go out. Here is what that looks like.
  We are nearing the end don’t worry. Thanks for reading all the way through I hope that I shined a little light on how the lighting is done in the caves of Everend. Taking all the things I talked about in the last section combining the quick turnaround, the final gather, and the ambient occlusion into the game we are given this which is the final result of the game.